Taming the Hand
Nowadays I begin as many of my projects as possible with sketching of some form. Often I draw the subject from reference photos over and over until I'm comfortable that my brain is on the same page as my imagination. Other times I dive straight in with shameless scribbles on nearby post-it notes. Illustration is an important part of my workflow and my successes and failures there help to define the tone of my final projects. For a very long time I was held up by the notion that there was one specific way to draw: with paper, sharpened pencils, erasers, and dedication. As it turns out, dedication is the only part of that equation that stays true across the board and my willingness to try other mediums and methods is what ultimately led me to encounter my own talents.


Scribble and Smear - A Process for the Imprecise
The process that's worked best for me relies heavily on my innate inability to get the first line wrong every single time. Instead of placing a single correct stroke, I've always had a habit of placing several bad strokes, then using my eraser to whittle the result down to the line I meant to draw in the first place. The problem was that I couldn't use erasers very well and no matter which pencils I used, I couldn't master lighter strokes without gouging lines in the page with my 6H pencil. In hindsight it was obvious that I needed a more comfortable medium than pencils.
My earliest alternatives ignored these underlying problems rather than working past them. Mechanical pencils allowed me to indulge in outlines while neglecting basics like shading and line weight. My digital work was even worse because I used clean white backgrounds with solid crisp black lines. Those outlines took eons to clean up and the resulting images were devoid of gesture, texture, or really any source of personality. As I began to fill up my first real notebooks and do more and more preparatory sketches for my projects, I realized just how important sketching was to my workflow. These, along with those done on my computer lab's massive Cintiq tablets, taught me to be critical of my own work and sensitive to my own shortcomings. I wanted to do better but I didn't have any solid drawing skills to build from--just some sloppy scribbly outlines that I wasn't really happy with.
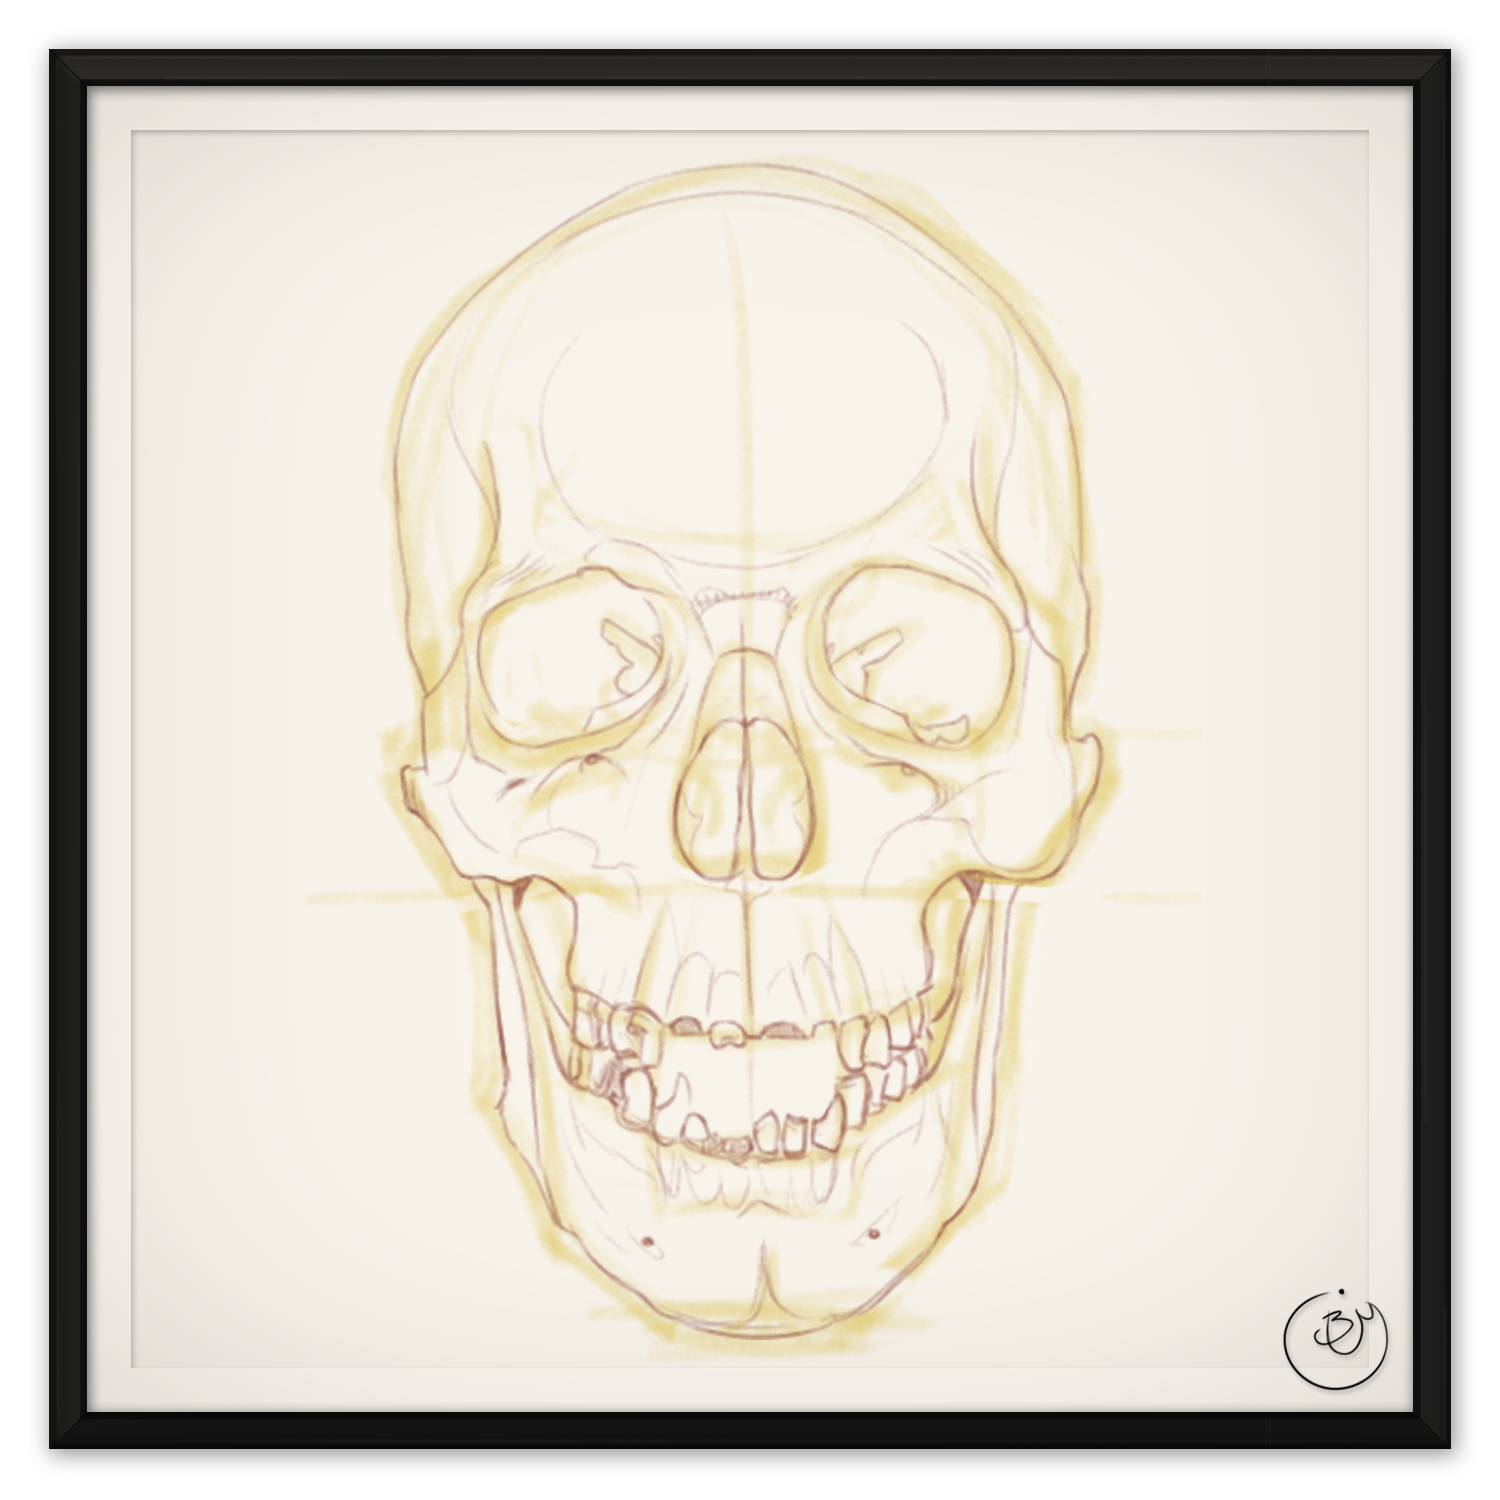
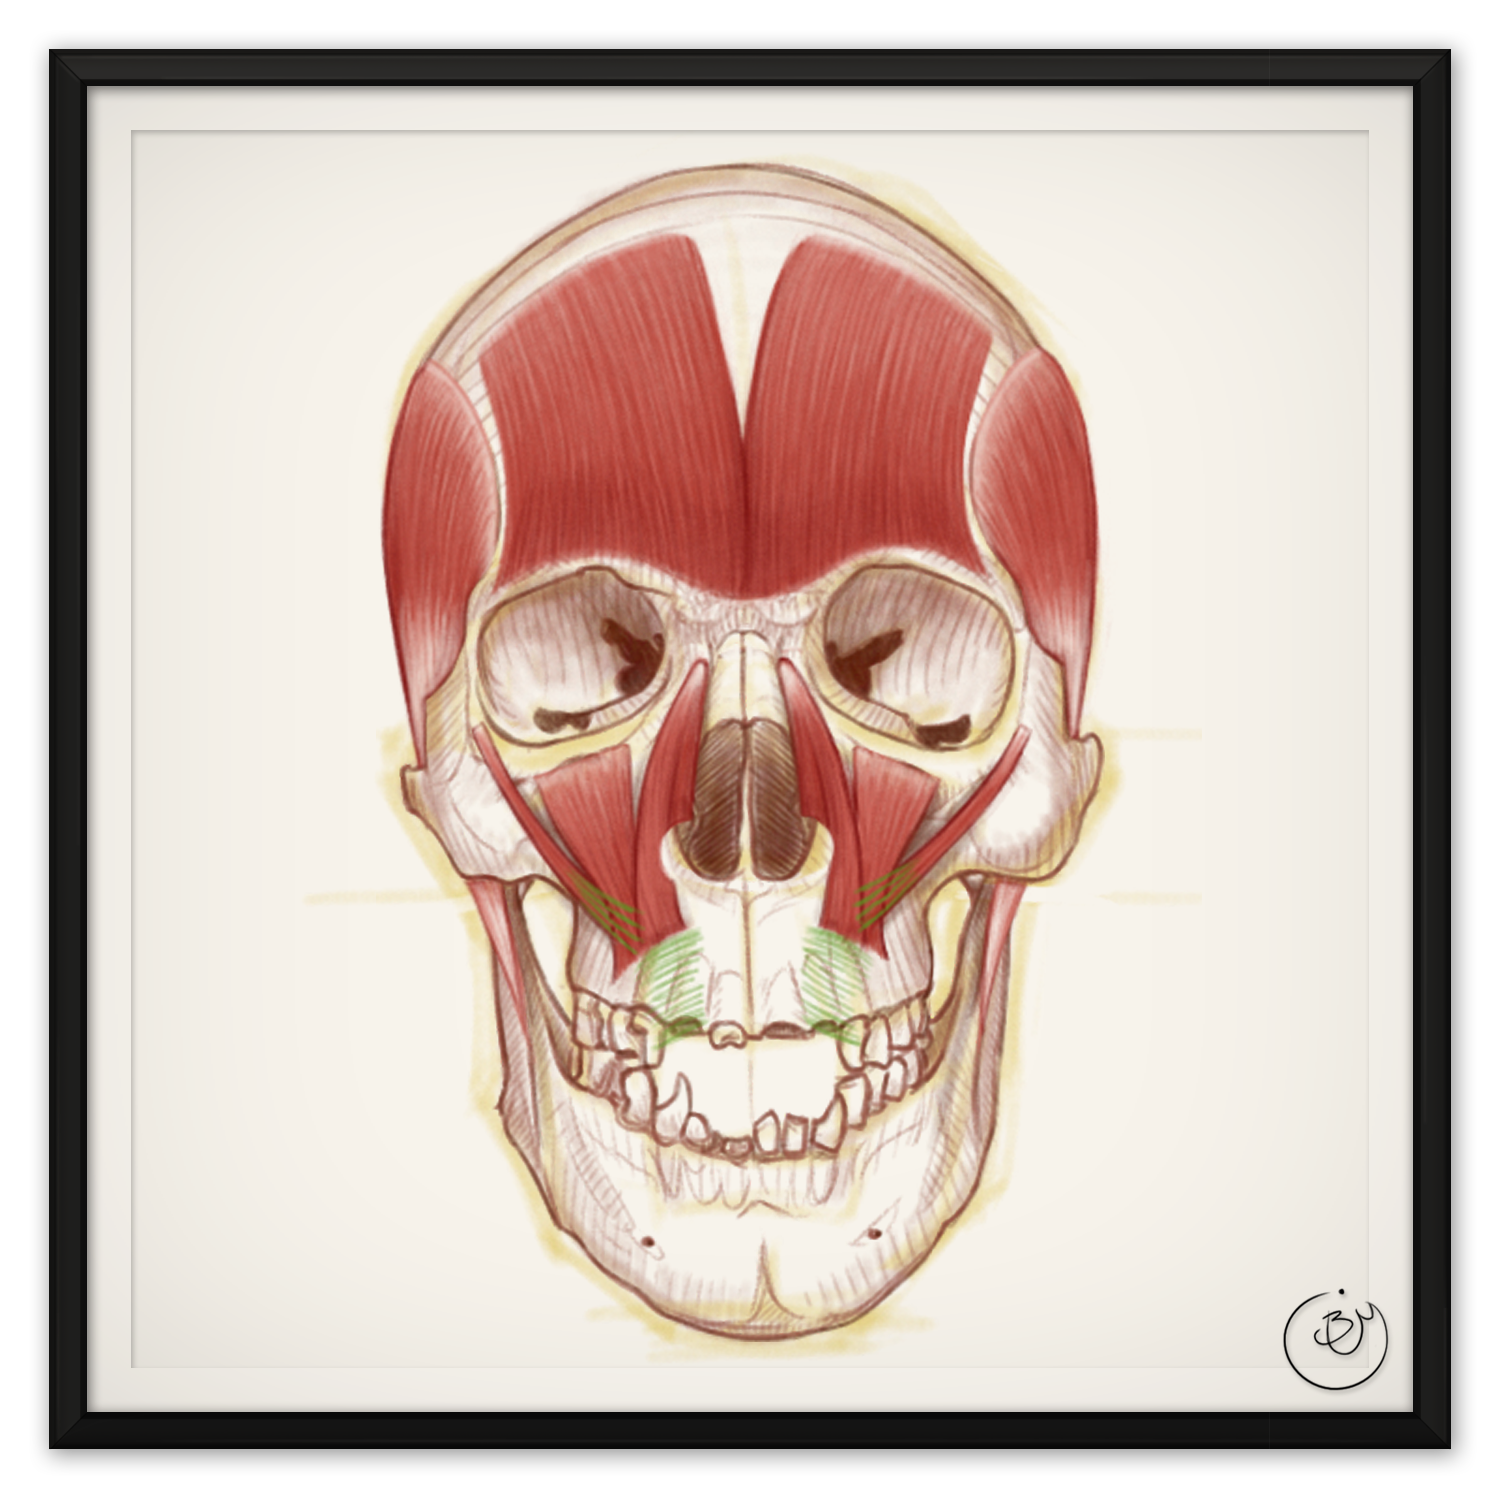
My current art style, as laid out in the images above, breaks up the elements of a sketch so that I only have to concentrate on one aspect at a time. I begin with an off-white canvas and a color palette (and brushes) that feel organic rather than perfectly digital. On my first sketch layer I use a broad, pale color that will later blend into the background. This first layer I use to establish proportions, planes, and the general position of everything. At this stage I can make as many mistakes as I want and work as sloppy as I please. With proportion and placement already figured out, I can then start to lay in my finished lines in darker shades. The sloppy strokes from earlier serve as the several bad strokes I need to make a good stroke, helping me to get these darker lines right on the first try. This entire process can be carried out with pale 10-20% gray prismacolor markers for scribbling with dark pen lines on top.
Solutions in Hindsight: Try Something Different; Repeat
In hindsight it's easy enough for me to pick apart the failings in my own drawing techniques and the ways I've overcome them. By and large these hiccups were not the ones my classroom assignments focused on. Your teachers will only ever understand the problems they themselves encountered and some of them undoubtedly grew up sketching masterpieces like it was no big deal. I wasn't like that, and perhaps you aren't either. The biggest step you'll ever take towards being a better artist is in learning to recognize that your holdups are your own. Not all brains use the same glue to hold everything together. The second biggest step we can take is in realizing that those fundamental holdups can be tweaked out of our systems.
My overarching suggestion for anyone reading this is to approach your sketches in as many different ways as you can. Fluid art is something you feel out, not something you can force. If you're drawing fast gesture drawings, don't settle for a single style unless it engages with you and don't be afraid to go back to the styles that didn't. Try drawing your gestures with bones and joints. Pause the timer and dig deeper into some anatomy or form that catches your interest. Forget yourself and do six slow sketches when you meant to do thirty fast ones. Mix elements of boxes and centerlines into your style. Build your gestures with circles and masses or try to use a completely random brush to see what happens (pencils are too precise for some strokes). Start and end your sessions with distracted studies of whatever your hand is itching to mess with. Run through your sketches with specific proportions in mind. Judge your success by how willingly you sat down to try new things. Gestures were one of the first things that really opened me up to pushing outside my comfort zone. Even when they failed, I knew I was studying a worthy subject.
Make a Library
Finding just the right books to appeal to your own way of learning is an exhausting process. As such, if you encounter a book that works for you, add it to your library or put it on your to-do list so you can come back to it someday. Below are some areas to consider expanding your resources.
- "Art Of..." books. Don't limit yourself to the films and games that you've enjoyed most, look also for the process work you find most inspiring. I like to see the early sketches and know what was going through the artists' minds as they worked. Not all "art of" books are made equal. My personal favorites are the in-depth Chronicles for The Hobbit films.
- The classics. In most artistic areas, there are a handful of authors whose work stands head and shoulders above the rest. They may not be written specifically for your abilities but keep an eye on these and get them where you can. I have a growing collection of works by old anatomy and gesture masters (artists like Bammes, Hale, Richer, Bridgman, Hogarth, Ellenberger, and Goldfinger).
- Technique books. It's hard to find a good how-to that works with your habits and reads well. We all have different needs and expectations from our paper mentors and you are the only one keeping track of your own. I enjoy technique books littered with specially prepared images and an abundance of visual notes. I'm less fond of dense tomes chocked full of complex vocabulary.
- Reference books, specifically the ones you don't expect. I have books of preparatory sketches by the old masters whose paintings we studied in countless art classes. I have a book that breaks down the structures of trees, bugs, and everything else in nature. I have a book filled with a large number of thatched Victorian cottages. I have a book that catalogs and pictures every single type of marble in Italy with examples of famous artwork in which it was used (strangely, this is physically the heaviest book I own despite its compact size). I have no idea what subjects interest you but, by all means, surround yourself in them. Exploring your interests is a crucial part of expressing your own creativity.
Knowing the Words to Ask Your Questions
Quite often I find myself staring blankly at a piece of paper or other medium, trying very hard to figure out how to begin to design whatever it is I sat down to design. It can be even more frustrating when a single image pops into your head and refuses to vacate, preventing anything new from emerging. One useful way to get around this type of blockage is to investigate the structure of your subject. For any aspect of your project's design, ask yourself how its parts and styles might be categorized and seek out the fields or experts who might already have done so. It's easy enough to find and dissect the human body but where do you start when express a person's geographic heritage? I always blank on how to design hair styles which is why I turn to hairdressers and online fashion sites to find the right words for what I'm thinking. Dig through historical terms used to describe the outfits of the era you're designing to. What real-world occupations might shed light on the elements of your characters outfit?
Vocabulary doesn't just help with characters, either. Almost any subject can be broken down into more descriptive terms that will help you get the references and inspirations you need to get your project done. You surely know your rivers, mountains, plateaus, and dunes but do you also know your eskers, thalwegs, riffles, tors, and inselbergs? Everything has its own anatomy. Trees have anatomy. Bookcases have anatomy. The night sky has an anatomy. You could find explanations for the tone of your voice, the knot of your tie, the trim of your doorway, and the frame of your bed. Find those explanations, find the experts who define them, and you'll have an easier time engaging your creativity in a dead spot.