*Please feel free to ask about any of these processes. Working alone on an uncommon art form with an unusual medium can be frustrating. I've left notes below for anyone stumbling across this page.
Composer Reliefs
My current job has me creating a series of composer portraits which are 3d printed and used as molds for glass paper weights. When I began I had only recently taken up sculpting and had no idea how to approach relief sculpture and not too many ways to find out. My first several attempts involved sculpting a full bust and flattening it down to match whichever pose my client had chosen. While this process may have been more versatile and, in many ways, better able to capture interesting subtleties in the final piece, it also relied on a blend of different portraits. For composers like Bach, who we have almost no references of, this helped. For composers like Stravinsky, who we have many photos of, this proved to be a bit of a problem. Even worse were composers like Mendelssohn who's portraits vary dramatically based on the artist depicting him.
Eventually, after learning a bit about what to look for in a relief, I began sculpting directly in relief, avoiding entirely the problem of flattening faces. To aid in this process, I created a simple set of meshes in which 90 % of the geometry faced forward. This allowed me to divide higher without worrying about having millions of useless polygons on the back. It makes things quicker and allows me to stick to single portraits as reference rather than the more experimental method I had been using.
Even rendering reliefs has been a different experience. It's impossible to show all the details of a portrait at once and I had originally relied on Zbrush's faked materials to bring them out. Changing the lights even a little bit can make a huge difference and cast completely different shadows. I had to avoid replicating the shadows I could see in the references or risk breaking the relief. These finished renders were made in Maya with the help of Mental Ray Proxies. I've included the entire set to show my improvements as I've progressed.


Problem Solving in Relief Sculpture
Compressing a full bust into a flattened piece created quite a few obstacles that I would otherwise have been able to avoid. The most apparent was in the way the available depth was distributed across the portrait. Most of a person's "face" can be found between the back of the eyes and the tip of the nose. Unfortunately, most of the physical depth of the face is from the eyes to the back of the skull. Realizing that the face from any angle can be simplified into a front and a side plane allows you to more easily flatten out these features. In real life, the farthest edge of these two planes will rarely ever be equally far away and the side of your head will almost always extend much further than the far side of your face. When working in relief, both of these far edges must end on the same back plane, giving a greater emphasis on the depth of the face while ignoring much of the side of the head.
I started off using wrap deformers in Maya to dynamically and logically compress the landmarks of the face. I assumed that visualizing these landmarks would give me greater control over the final depth but I later found that Zbrush's transpose tools could skew much more accurately and more intuitively for my needs.
When choosing how much depth to give to each feature of the face, the one thing I almost always tried to maintain was the depth of the nose. The nose exists in its own layer of depth beyond the rest of the face. Stretching it out does little to the rest of the face. Contrasting a deep form against a flat form lends depth to the flatter and, because it was often difficult to reduce the farther eye socket, I chose to distract from their unrealistic depths by giving the nose such emphasis.
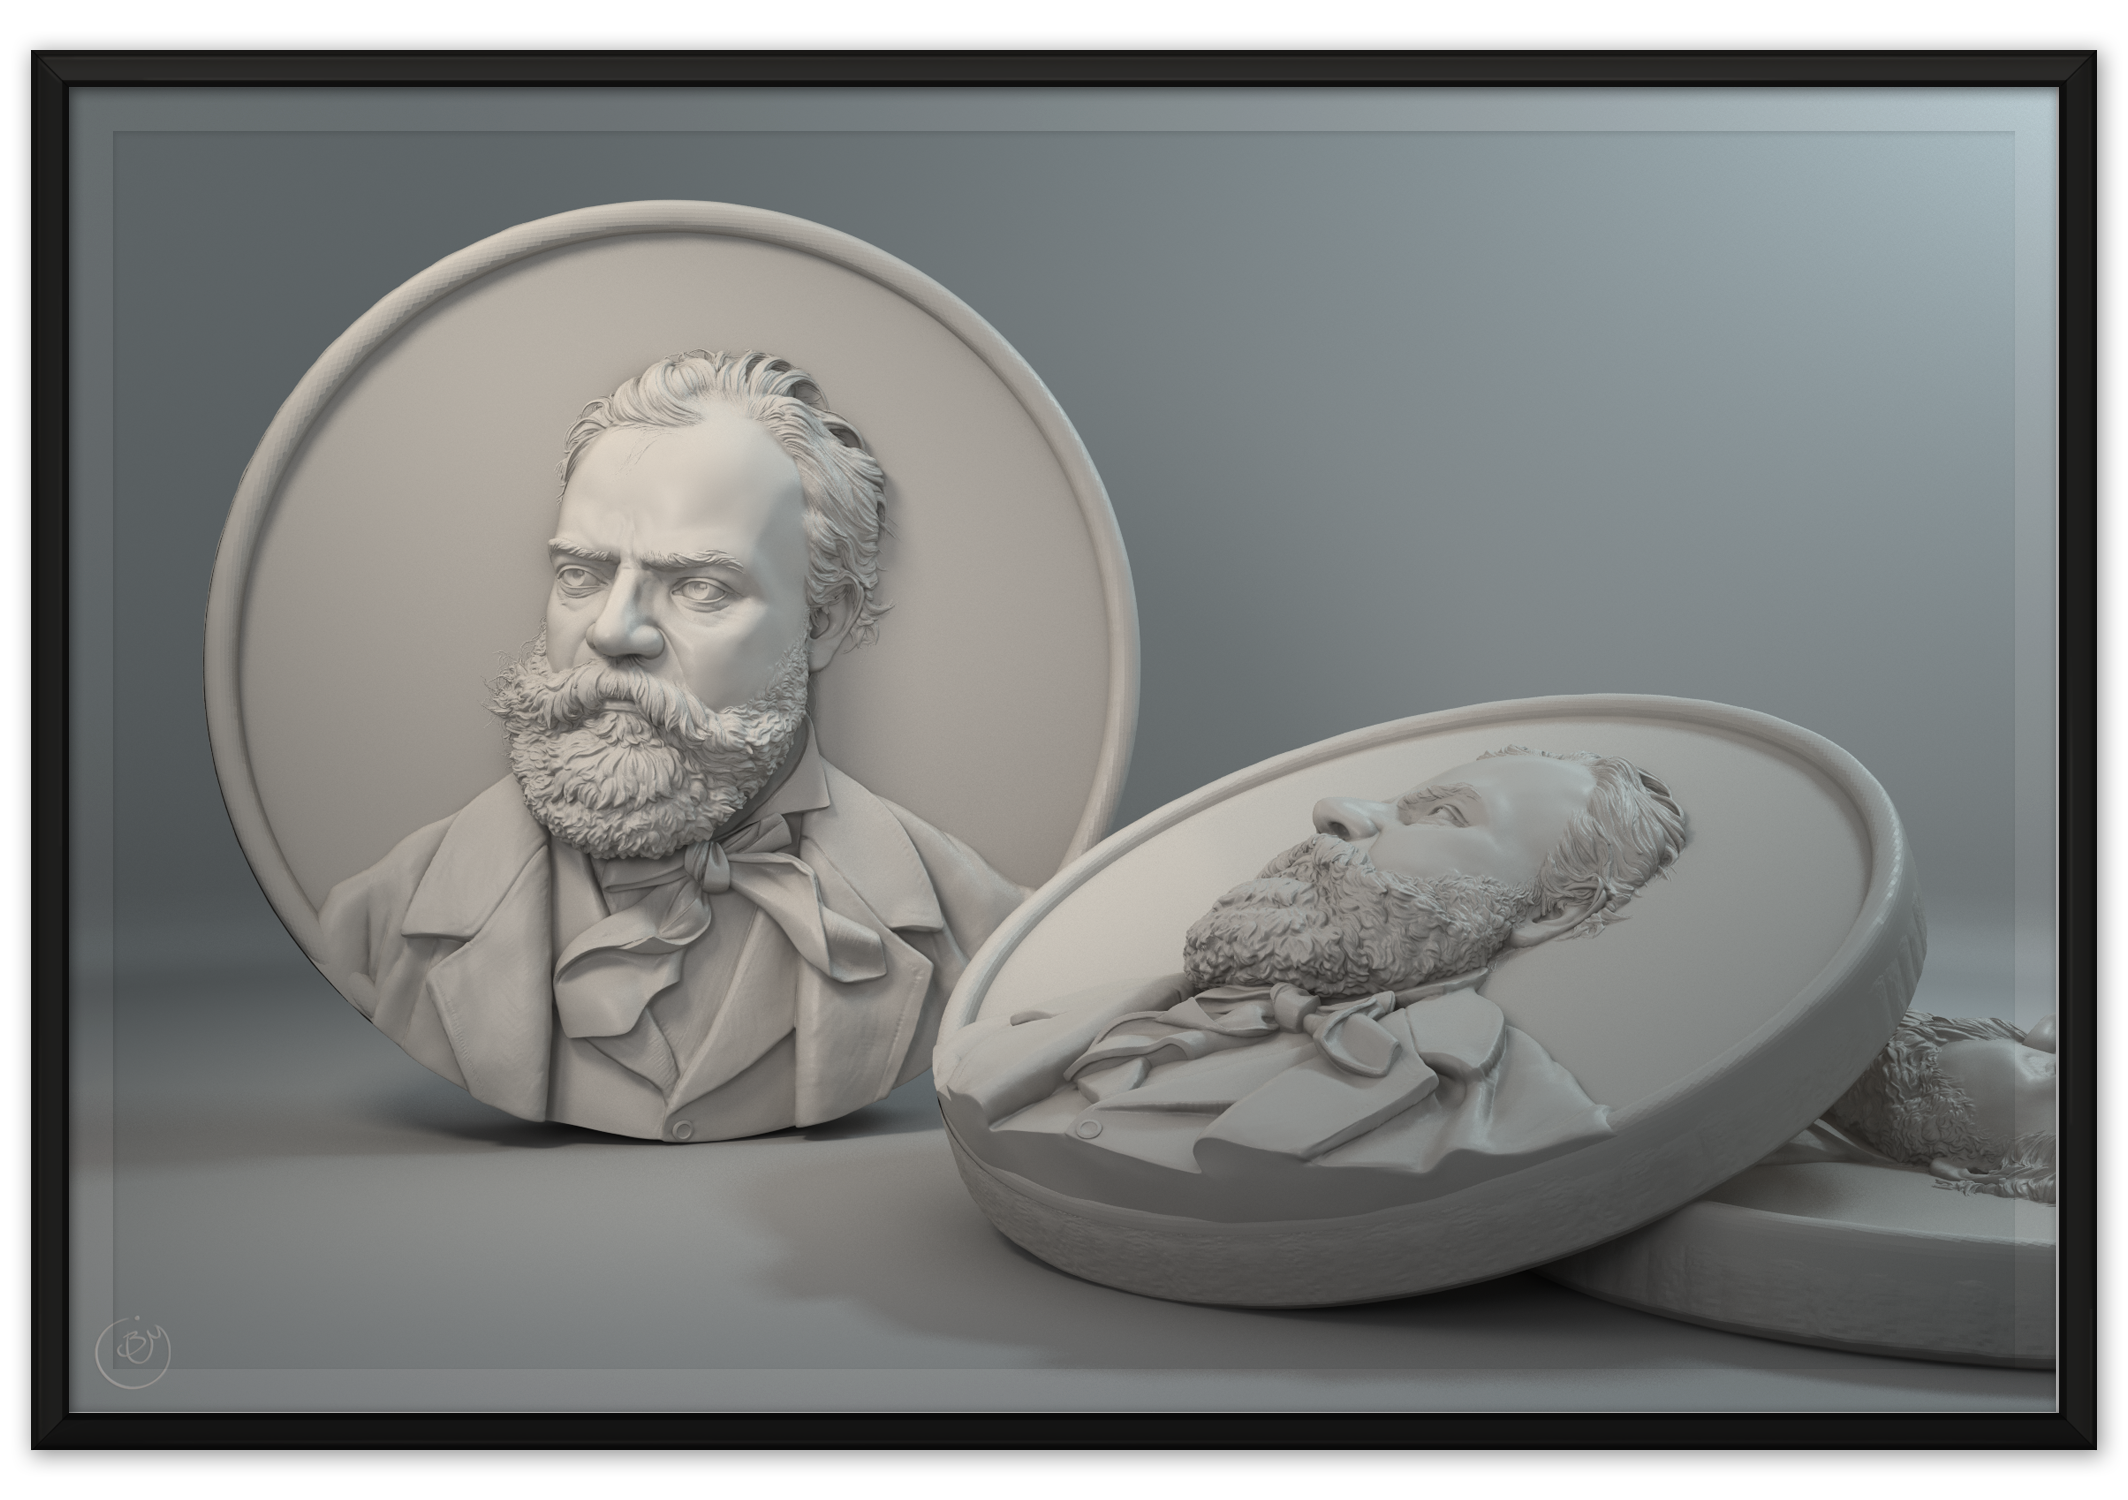
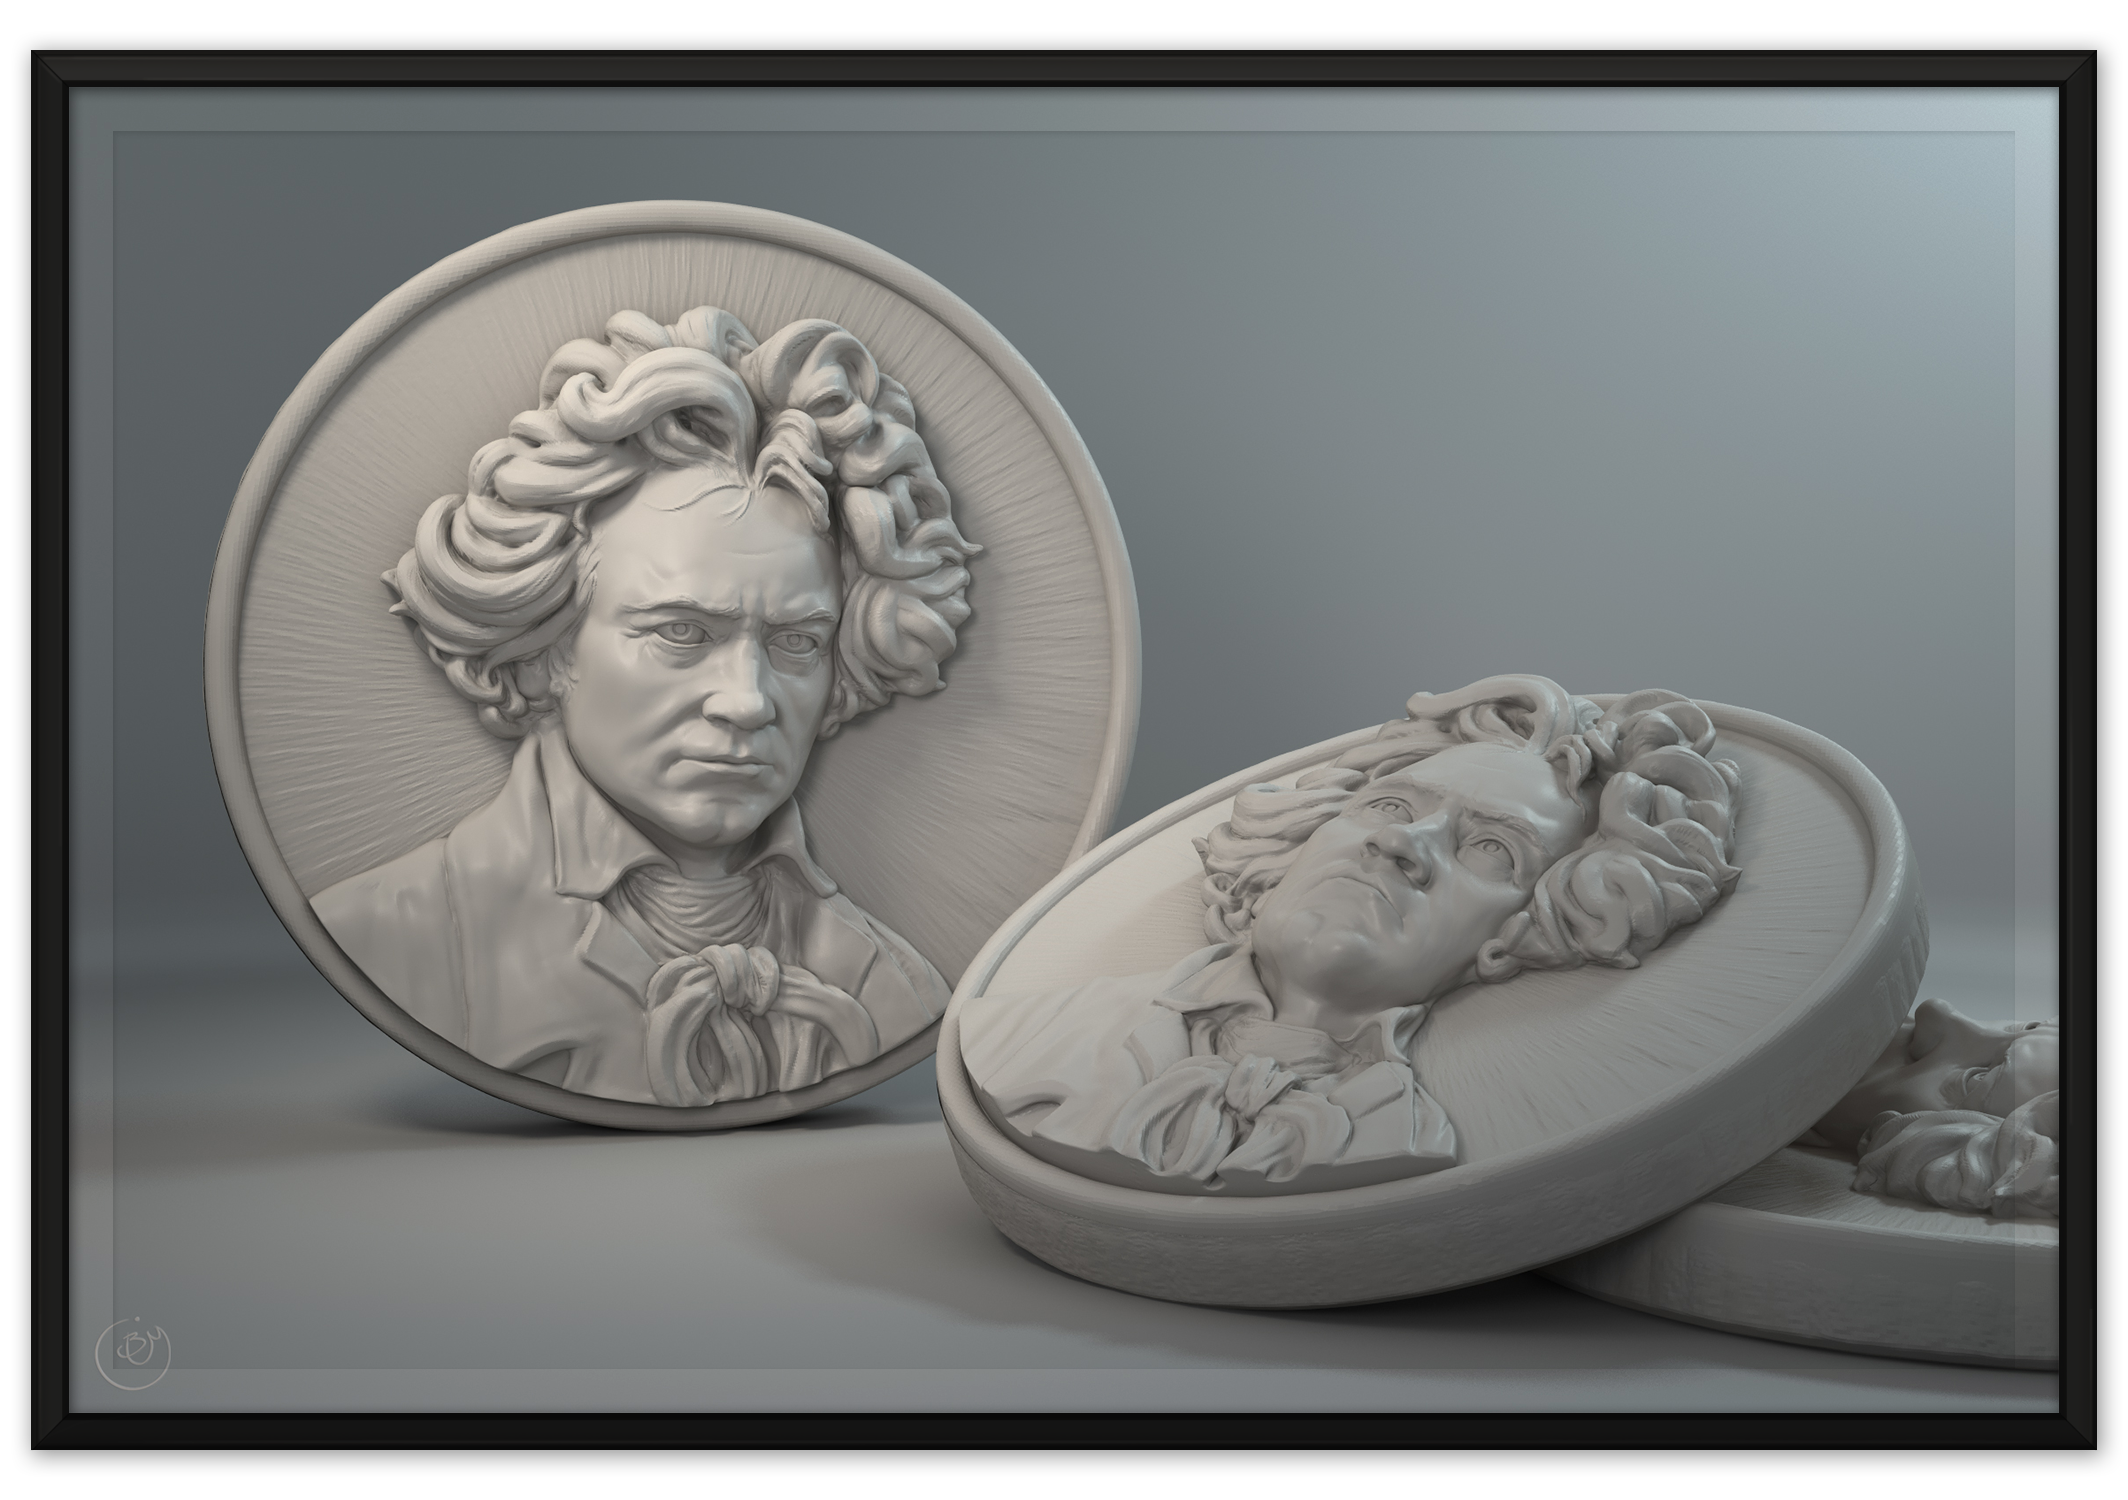
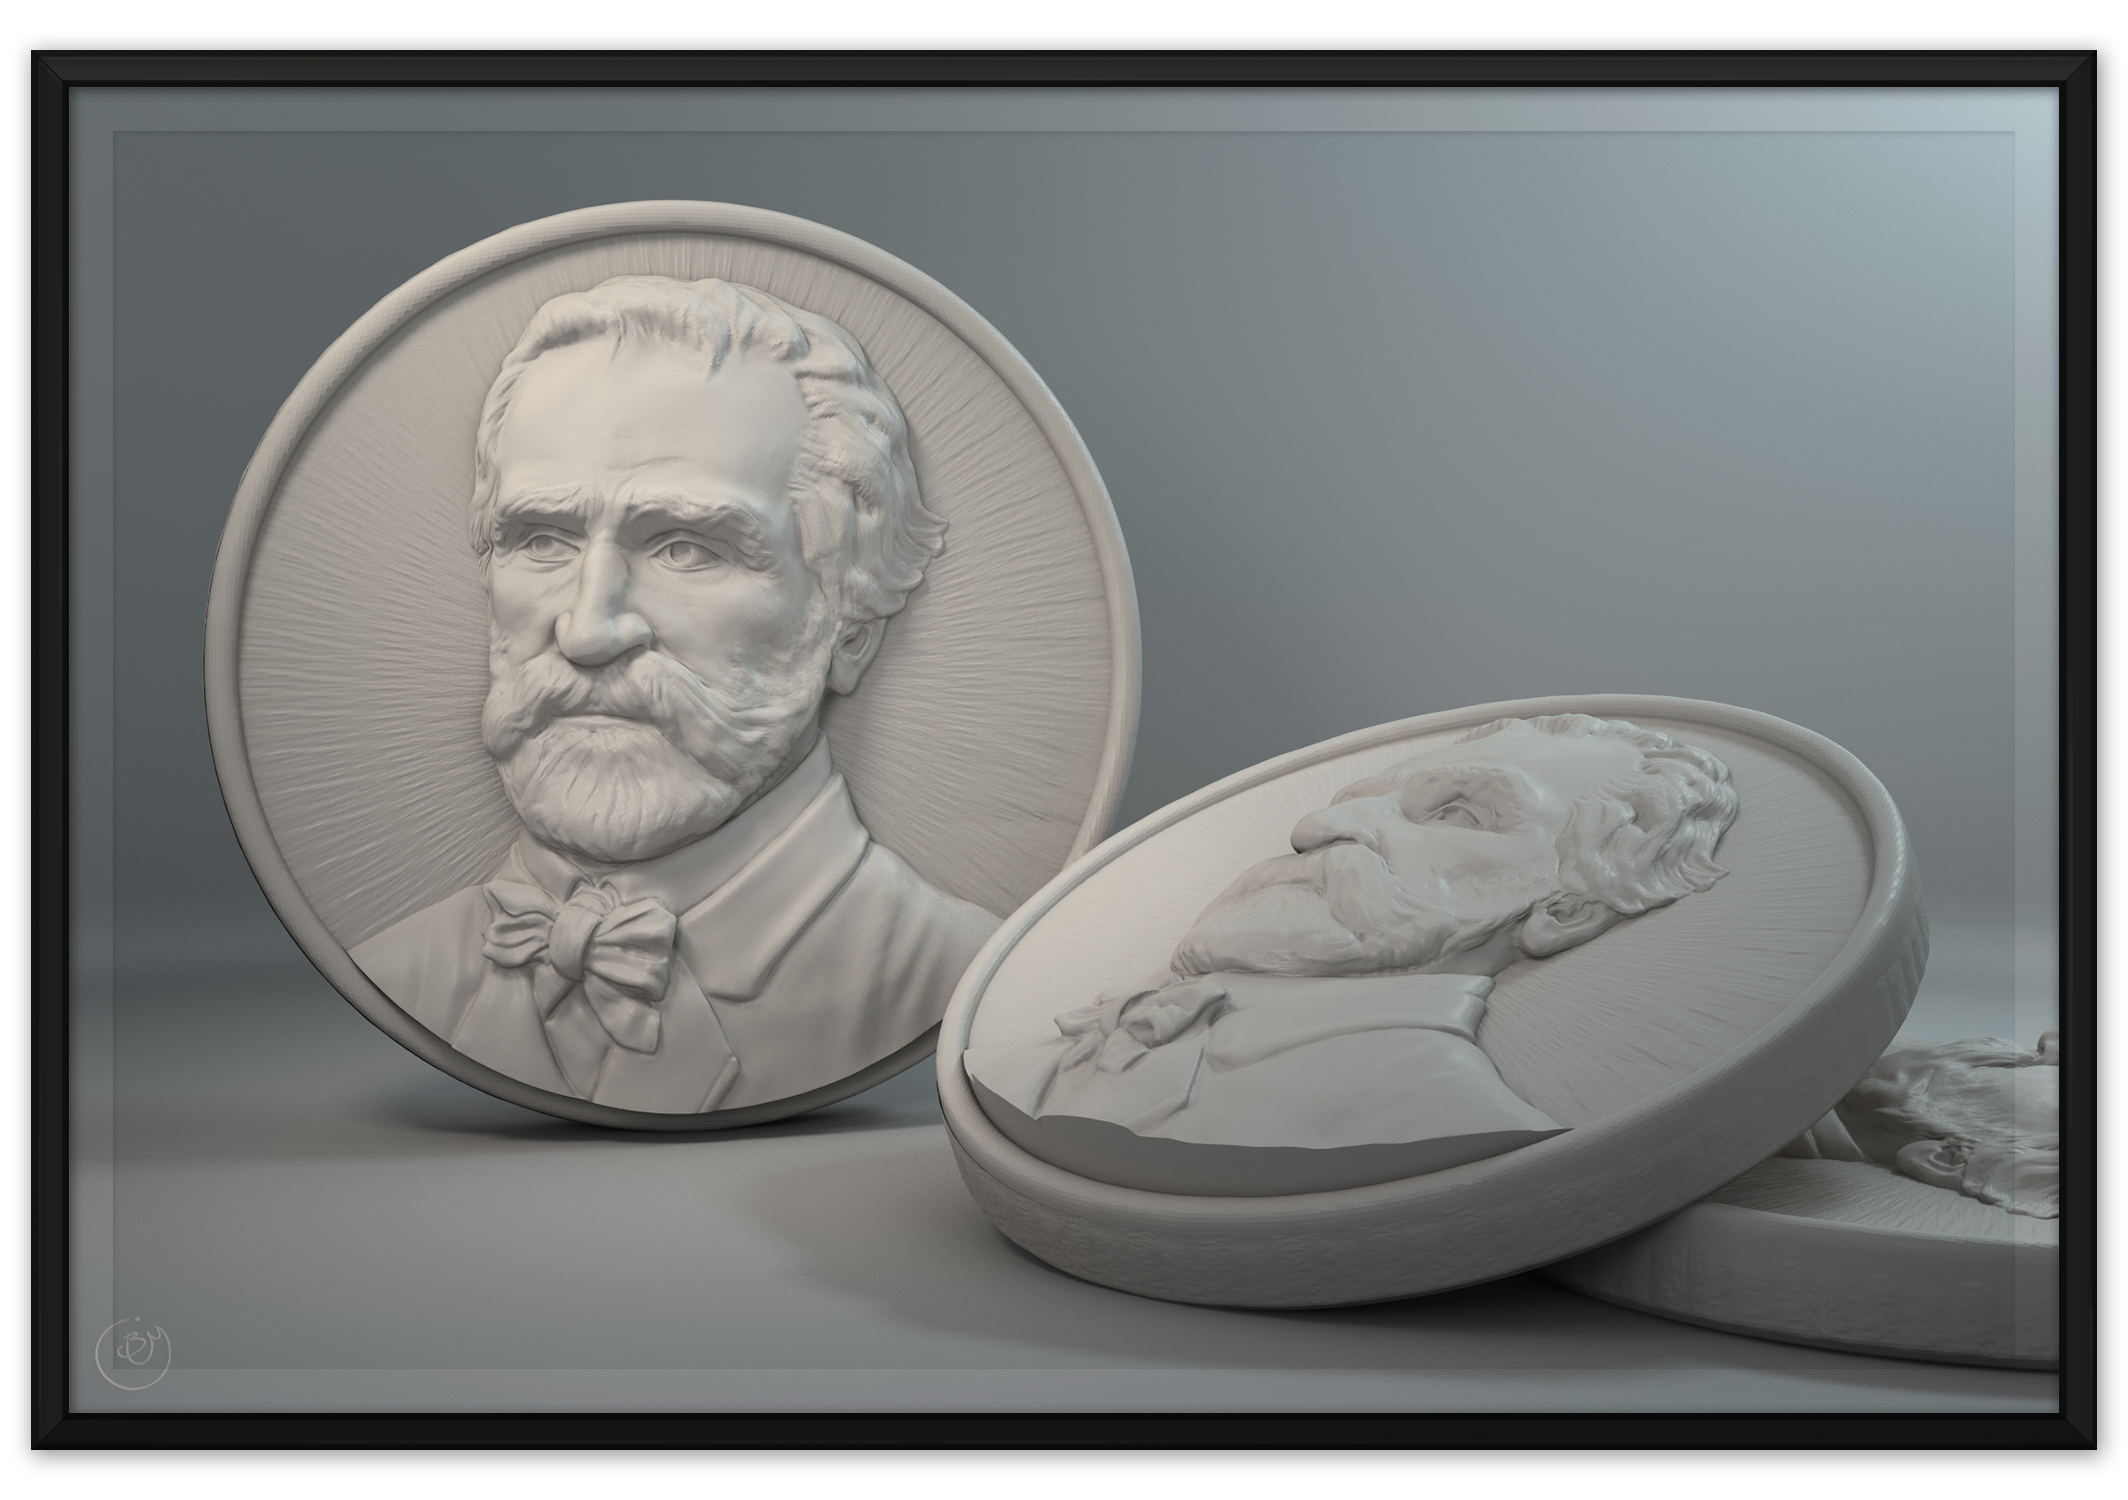
Torsos were always the easier parts of these sculpts in part because artists went to such lengths to stylize and depict them in the first place. I got much better at creating crisp, clean edges and appropriate depths. When compressing from a full bust I often had to cut the visible torso into chunks and compress them separately (Beethoven from the side is a good example). Comparing my earlier Verdi with the much later Rossini shows how much of a difference it makes to skip the compressing process and work straight in relief. Giving wrinkles a lot of depth and working out problems with overhanging geometry earlier in the process both enhance the final look of the composers. The hardest part is the transition to the neck. These outfits often cut up into the neck, creating oddly stretched skin. Trying to balance the cutoff sometimes involves hiding it completely and getting back to the torso's depth as subtly as possible.
Hats are worth noting because they really don't work as well. I knew this going into Puccini and I think it worked alright in the end but I would definitely avoid hats wherever possible. Hats cover the full depth of the head and then some. Giving them realistic depth relative to the rest of the portrait makes them stand out. Not giving them enough depth pulls the forehead back with it. In the end I actually tipped the forehead back into the connection to the hat so that I had more depth to work with. Even still, looking closely you can see the slight pinches and plane changes that occur as the had hits the back plane of the available depth to either side of the head.
I created a few base plates in Maya which put more than 90% of the polygons face forward. As I divide, I am able to work with almost all of the available mesh without worrying about excessive and useless geometry on the back side. Were I not printing I could have removed the back side entirely. The border and the final base plate (with the simple starburst on it) are both separate pieces. The downside to relying on a specific back plane is that it's difficult to create reliefs that push both emerge and recede into the plane. On the other hand I am able to work on layers and use morph targets and projection to better manipulate the density of geometry in some areas. Again, though, I will never be able to add new geometry to the plate without separate objects as I might if I used dynameshing. As a result it's usually best to work out these deficiencies early on when designing the overall forms.
Eyes are something of a stylistic choice. Sometimes they work, sometimes they don't. It's hard to look at a face if the eyes don't have the same depth to them. At the same time, it's hard to look at a face where the eyes have the same depth but exist in the same plane! As I mentioned, I used the nose to help separate them and cover the irregularities. Pupils, however, still needed to look relatively similar despite being sculpted into entirely different forms. By the time you get around to sculpting pupils the eyes will look like two separate lumps of clay that have been stepped on and squashed about before being brought back together. If they cast any shadow at all, the slightest change of angle will throw off the appearance as you sculpt them. When you're staring as closely at a portrait as you do when you sculpt in relief, these minute changes can drive you insane. Finding a pattern to represent the pupil, iris, and specular highlights often involves googling examples of classical sculpture. I don't know exactly what works best but if you hadn't noticed a problem with the eyes I've sculpted here, chances are they'd be a good place to start.
Schubert and Stravinsky both had glasses. I modeled these correctly in full and flattened them down later. I extruded them and protected the edges. They look strange to me, especially from the sides, but I couldn't come up with any other solution that didn't just mold to the face. If I weren't printing these I could have floated them more appropriately away from the face.
Hair in Relief
Hair was perhaps the most time consuming part of many of these portraits. Too many of the composers were fond of wigs and unkempt hair, resulting in hours of tedious experimentation and frustration. I realized that I didn't know what the back of a head looked like or how to balance such distinct and curly hair patterns. I also realized how much easier it is to simplify hair in two dimensions. I didn't just need to fill in the entire space, I had to do so at a similar level of detail to the rest of the face.
I've experimented with most of the common solutions to hair but still have no clear answer as to the correct approach. It's easier now that I'm working from a single photo for the final relief but that could be because I finished up the curly haired men. Digging the hair curls in too soon can commit you to difficult geometry but waiting until you've completed the portrait's details will make even the roughest sketches look terribly awkward. Using insert brushes to duplicate curls requires knowing more precisely how the finished hair will look and doesn't necessarily create relief-friendly forms either.
When I worked on full busts I found it very hard to maintain the contours I'd eventually need for the completed piece while also wrapping it realistically around the head. This is apparent in models like Beethoven and Bach who were later flattened. Mendelssohn's hair was taken almost directly from his portrait and seemed to differ from the impression of curly hair I had been building. Strangely, the first two composers I tackled, Verdi and Schubert, gave me less trouble because I probably couldn't have pushed them farther even if I had wanted to.
Later I found that I could simplify the hair better with the higher density relief geometry I was using to sculpt directly in relief. Being able to capture some of the wisps of hair along the edges and not having to worry about overhanging and overlapping geometry made more shortcuts available in the open spaces.
Facial hair is another beast entirely. Not only are the mouths irregularly cut off when viewed at an angle, the curve and projection that might indicate the form of a beard are also skewed as the far cheek recedes (Stravinsky). Forward facing mustaches are almost flat, betraying the forced perspective of the face (Puccini).