Home A Drone - Technical Breakdown (2019)
Unity, Maya, Quixel Suite, Photoshop, ZBrush, Marmoset Toolbag

VR Design and Optimization
The often strict limitations of developing for VR strongly influenced our initial designs and, later, haunted our efforts to optimize as we neared release. In VR, lag is more noticeable and can even make some players sick. With every frame being rendered twice, performance costs on every asset and effect were doubled making it that much harder to avoid lag. Our decision to remove teleportation and build for the minimum playspace compounded existing level design challenges, as did limiting the action of the game to a 180 degree sweep in front of the player.
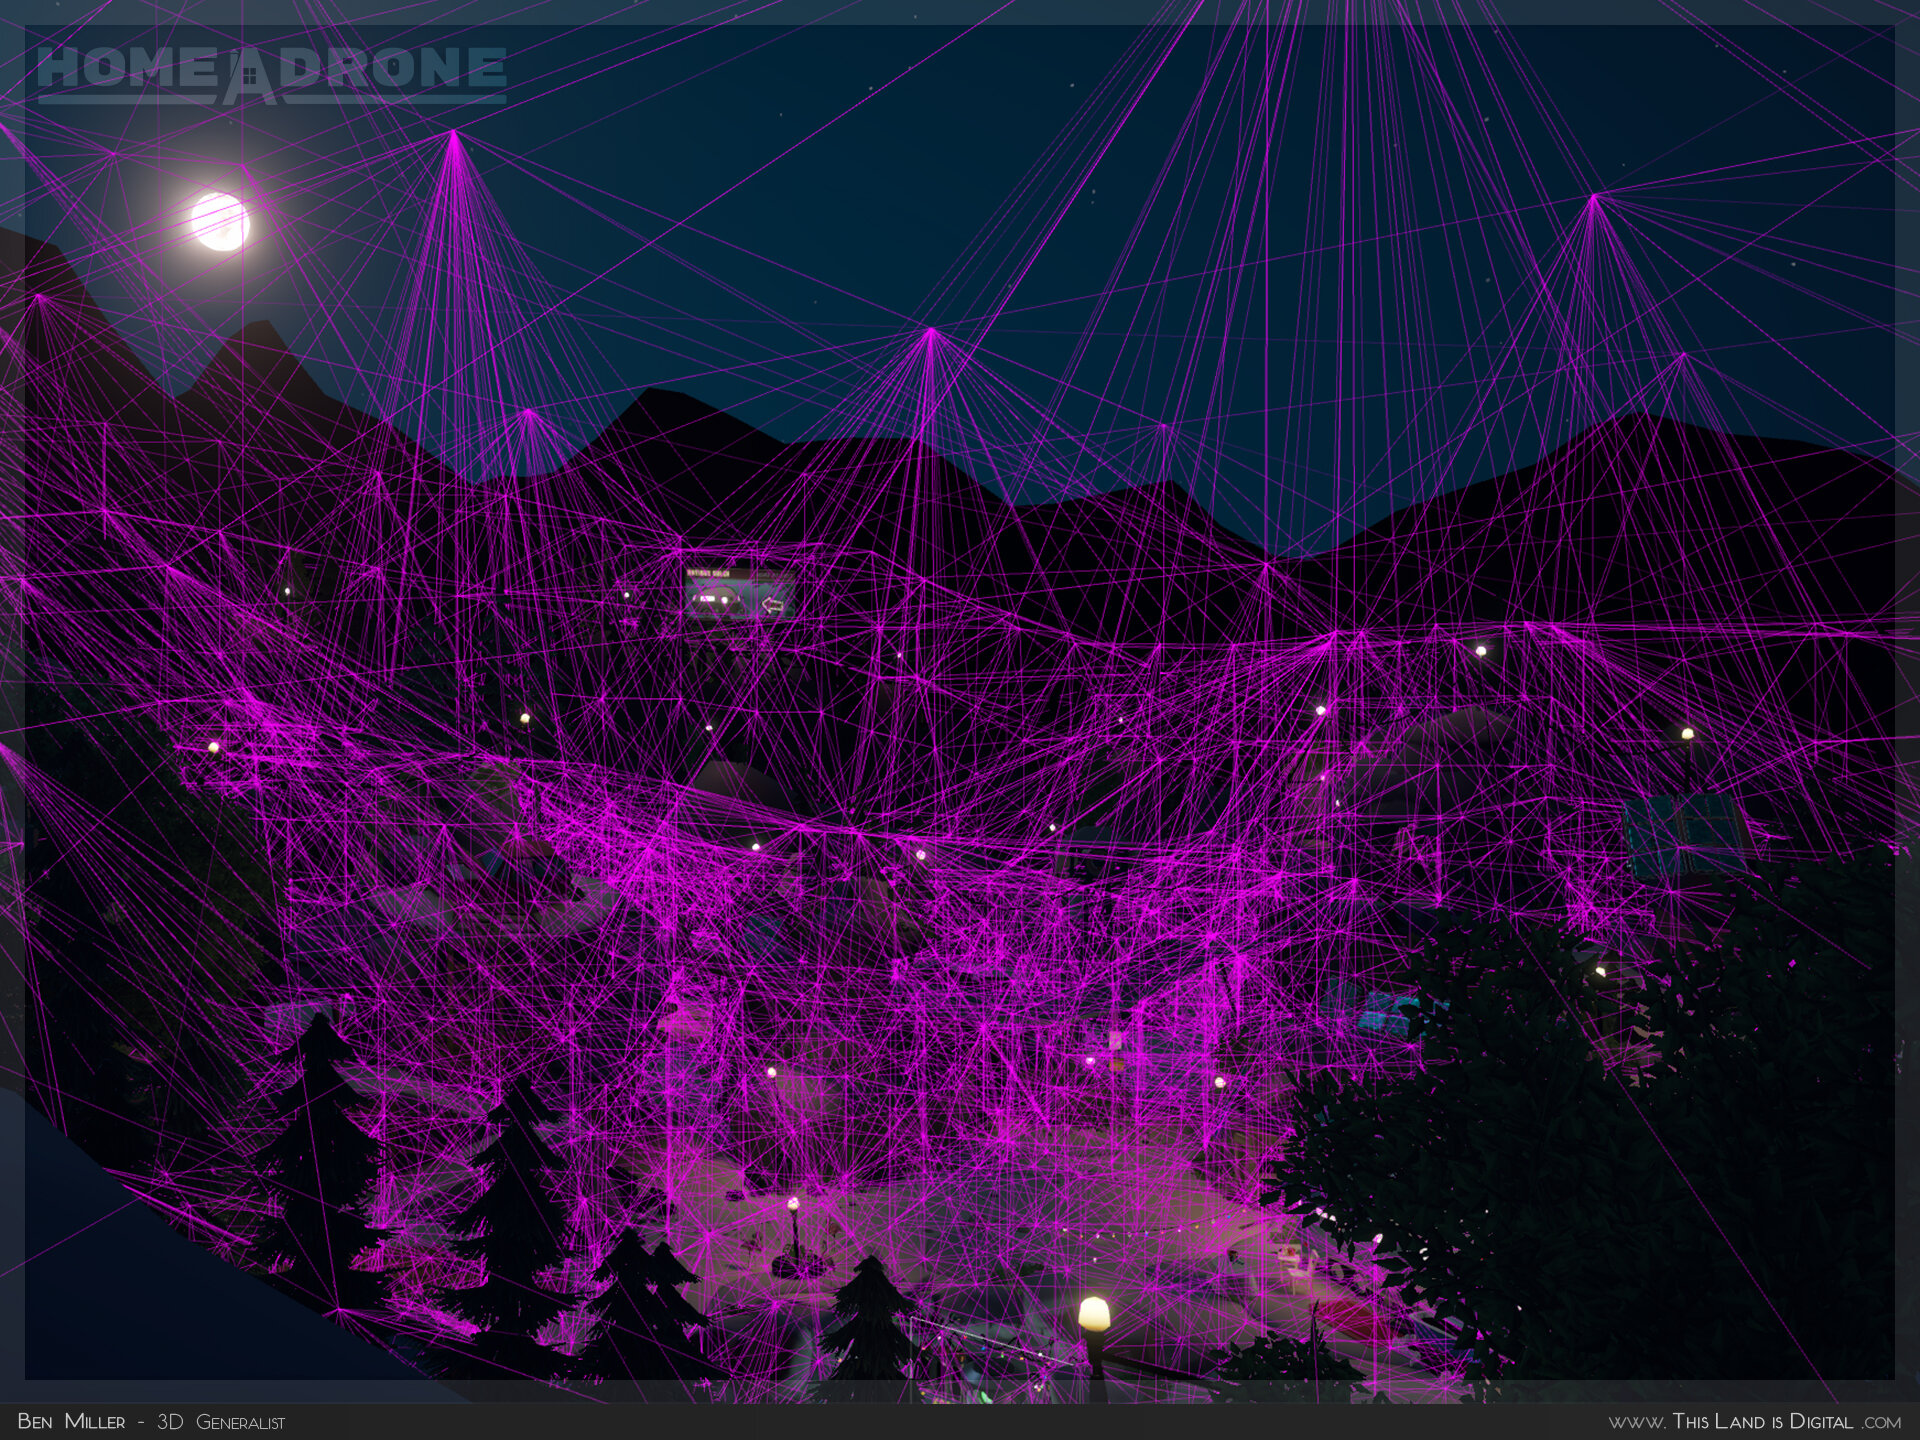
Light Probes
Dynamic assets were quickly becoming a huge performance burden as the game developed. Every single projectile, drone, weapon, and interface element needed to be lit in real-time. Many of our mechanical assets were broken into numerous separate meshes for faster prototyping which amplified the cost.
I used Light Probe Groups to eliminate the need for real-time lighting and shadows altogether. Due to the organic nature of the environment, I had to create a vast network of probes to match each path and tunnel as it wound its way towards the quarry. This saved performance throughout the entire production as new assets were imported into the game. Our plants used light probes to achieve softer illumination and avoid any baking artifacts caused by their artificially carded geometry.

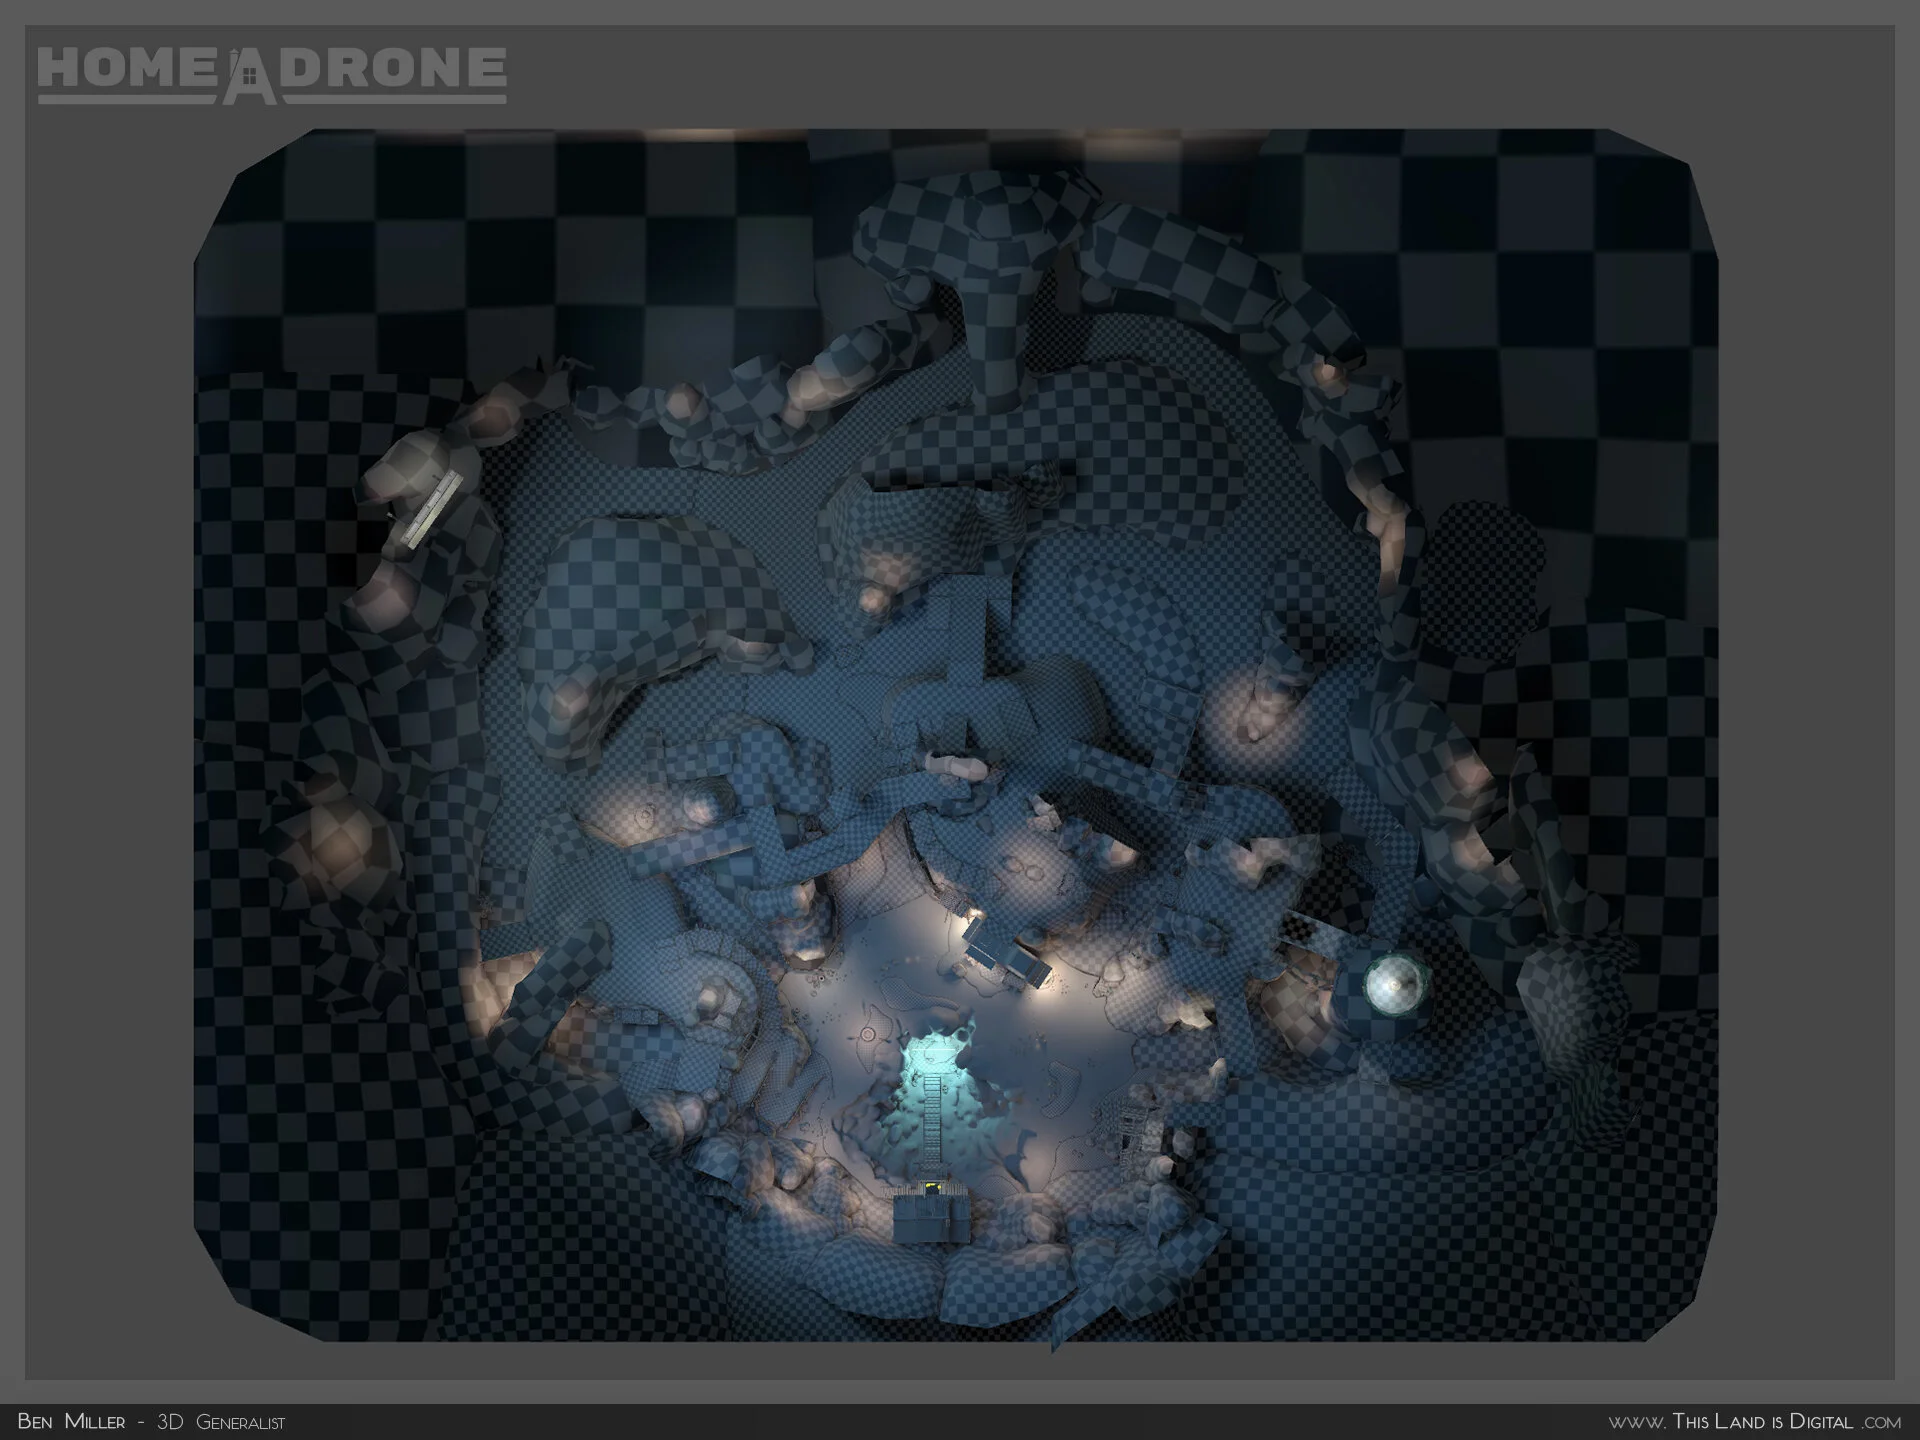
Navigation Meshes
After our workflow for using NavMesh Components was established, the task was handed off to me so that it could grow and maintain itself in alignment with the environment itself. I used disabled gameObjects to store geometry that was used exclusively to bake the NavMesh, then organized it in such a way that the team could repeat the process as needed.
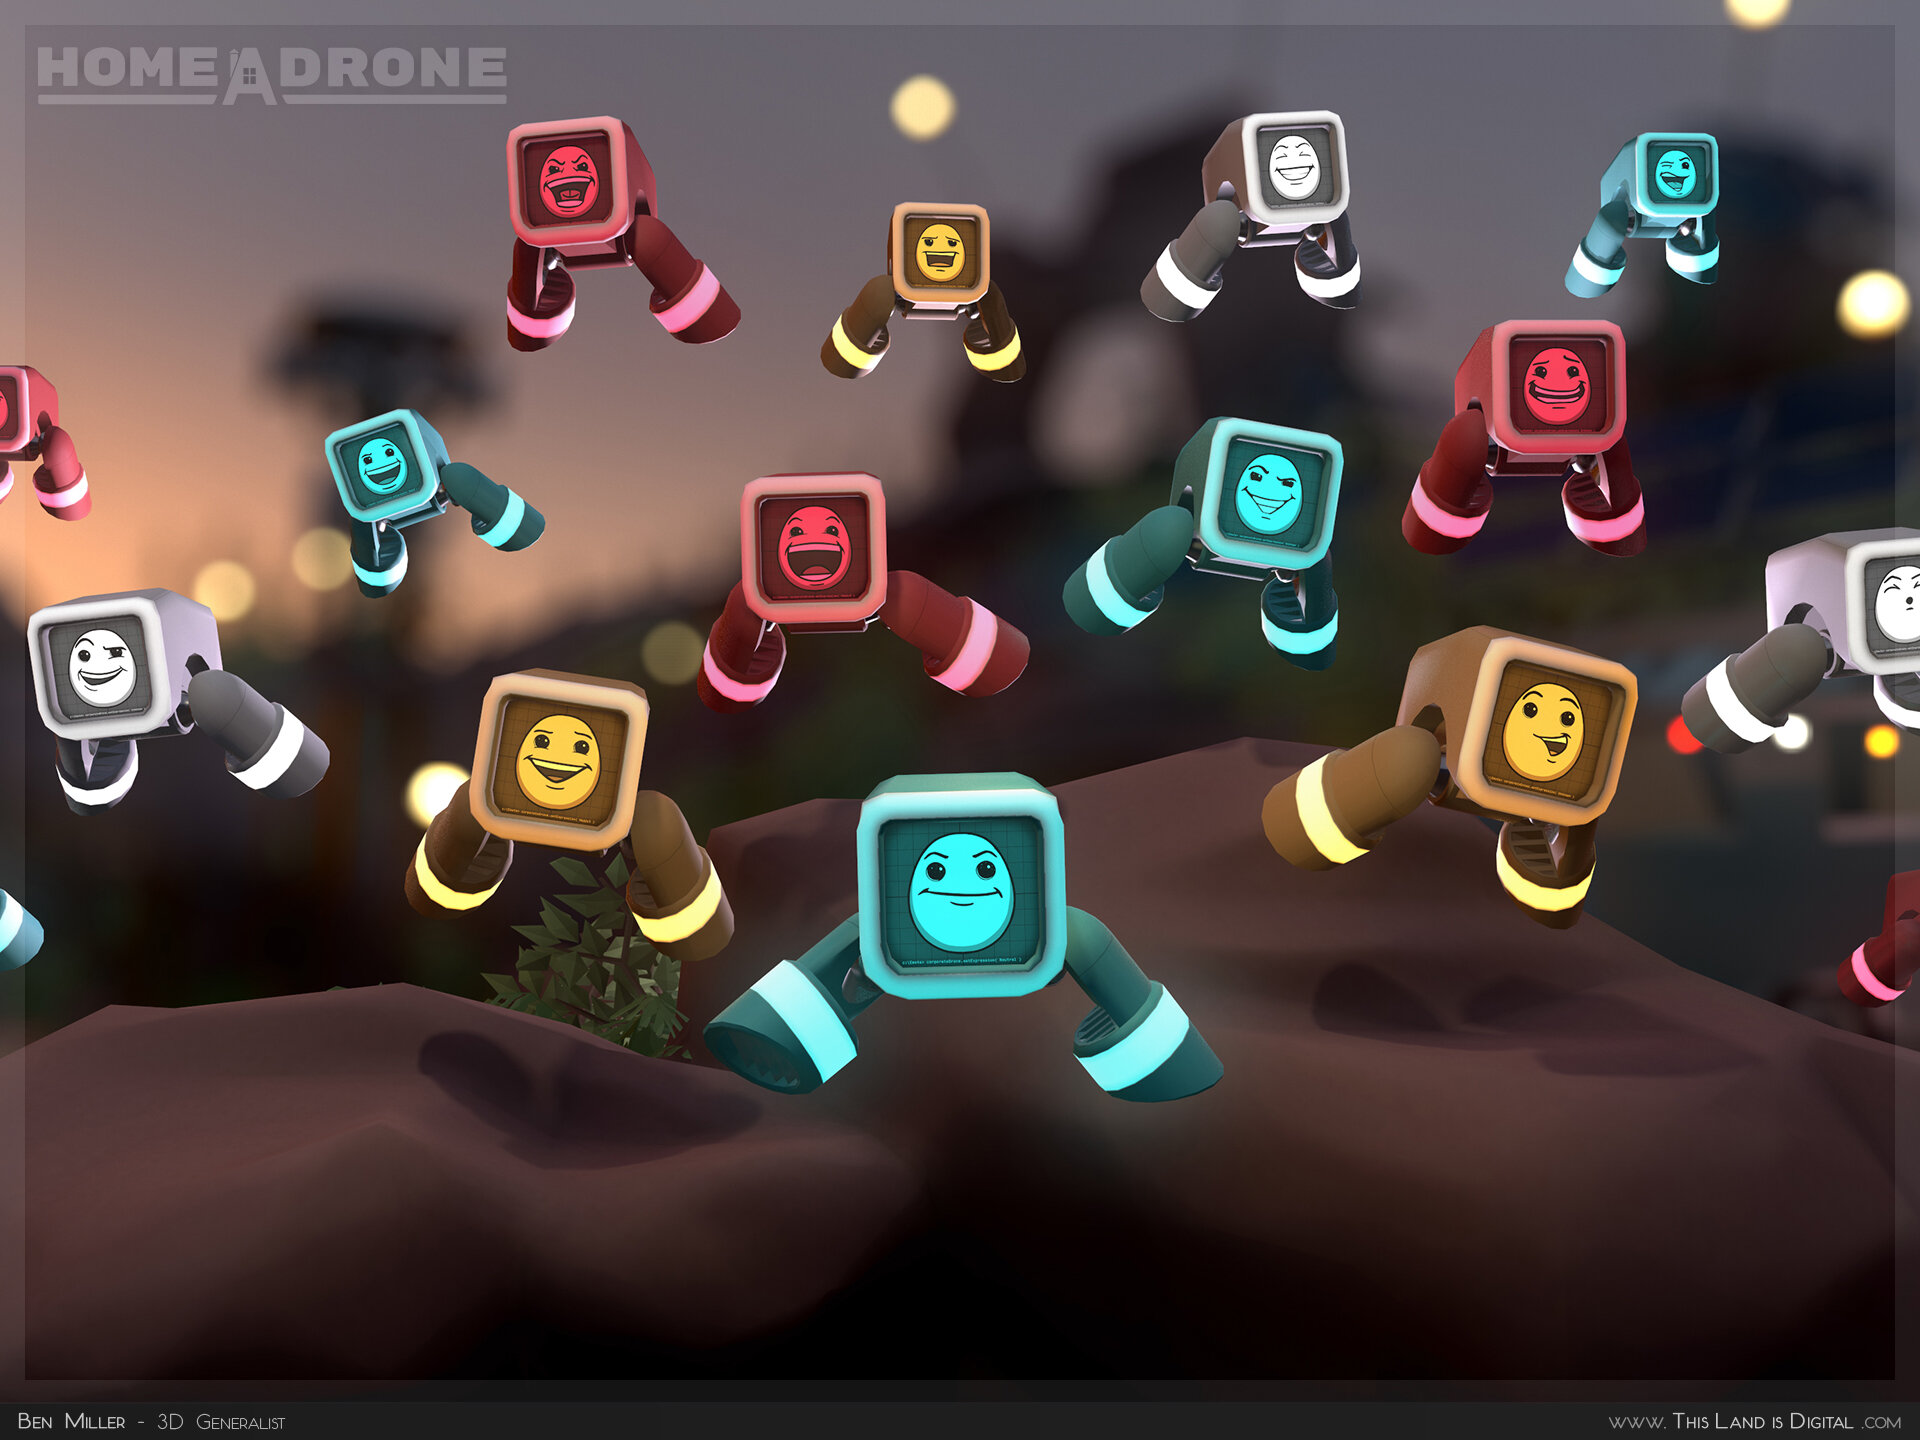
During our early prototyping, I used a number of tricks to forcibly simulate the effect of drones wandering through the yard before attacking. This helped inform the eventual behaviors that our drones used to randomize the game.
Light Baking
All static objects in our scene with the exception of plants used Light Baking to significantly reduce performance. I manually set appropriate Lightmap Resolutions for every asset in the scene, ensuring they all either had custom UVs or, in a few cases, generated UVs. Every light in the scene was either set to bake or given strict culling filters. I diagnosed issues that would arise in the process and kept the team informed about how to perform similar bakes in their own scenes for smoother testing.
As production neared completion and the scene stopped changing, I set up and stored higher quality bakes to protect them from competing scene files and version control overwrites.

Occlusion Culling
By default, Unity automatically calculates frustum culling to remove objects outside of the camera’s view cone. While it ultimately made little difference in our open-space level design, I spent time researching and setting up Occlusion Culling to remove objects within the camera’s view cone but hidden by other objects.
The most important thing I learned is that Unity’s documentation is obsolete. (1) Unity automatically fills the entire level with View Cells even when you place custom View Volumes. If you place your own volumes, the cells will be sparse. (2) Dynamic culling is now automated, so the “Is View Volume” checkbox and the assignment of dynamic areas is obsolete. (3) Umbra, the software behind Unity’s culling, has a much more informed series of articles to learn from.

Level Design
My designs were made under the assumption that we would have just three months to produce the entire game. Complicating things further, it would take several weeks for the game’s own mechanics (and story) to reveal themselves, meaning that the level’s design often preceded the gameplay it was meant for.
With little time to spare, it was imperative that I break down my designs at each step to ensure that the underlying system was something our engineers could develop towards. I described the purpose of each feature, checked it for weaknesses, and built a number of prototypes to test both my own designs and those of the rest of the team.
During this time, I tried to keep my aesthetic choices as recyclable as possible and to limit how much time I spent on parts that might be replaced. Getting to the prototype as fast as possible kept me on pace to meet each deadline.

Gameplay Prototyping
Gameplay and level design should be circularly informed. In our early production, we had yet to thoroughly design our gameplay and weren’t sure which of our ideas would even work. Rather than waiting days and weeks to test clean mechanics developed by our engineers, I accelerated their efforts by preparing prototypes that simulated larger and larger experiences. These gave us more immediate feedback, saving our engineers from working on dead end mechanics.
I further helped by collaborating with our programmers to design a specific set of behaviors to drive our drones. By participating directly in the design of gameplay, I could predict and prepare my levels long before testable mechanics emerged.

Foliage and Billboards
Plants served an important role in our final environment. They provided silhouettes at several depths, softened the edges of low-poly terrain, and balanced out the color palette to make it all feel more welcoming.
Extreme time constraints lead me to purchase an existing pack of plant assets in a style that complimented our game. To optimize them further, I created simple billboards for each plant and calibrated their prefabs’ LOD settings to take advantage of them.
Marketing Renders
As we neared completion, I shifted my efforts towards the production of a number of marketing stills for use across various media platforms. To do this, I gathered our assets into an external rendering engine (Marmoset Toolbag) reassigned their textures, posed and lit them, and set up their renders. I used Unity’s FBX Exporter to extract the environment as it had been arranged in-engine along with all of its plants and light posts, both of which were critical to matching the balance of colors in the scene.

Version Control (Plastic SCM)
When working with a team, it’s critically important that everyone have the same files. With the guidance of our engineers, we established a structure that kept our branches separate so that we could develop together non-destructively. Below are some simple rules I kept in mind each time I used our version control.
1. Always double check whether anyone is editing a set of files before doing so yourself.
2. Never push to stable branches without testing your changes thoroughly.
3. Push regularly, not rarely. This helps to isolate when things went wrong.

Scene Organization
Due to our limited timeline, we frequently worked in copies of the same scene. We had very little time to keep track of one another’s work within the scene so when it came time to integrate, no one was entirely sure what had changed, where it belonged, and whether or not we could delete abandoned gameObjects.
To remedy this, I created a simple top-level set of gameObjects to fence in our efforts and give us explicit domains to work within. The added level of modularity allowed me to swap entire sections into the scene when rather than finding the exact assets I’d changed. It enabled us to understand and, importantly, to navigate one another’s work.